Drilling the Working Joints
Joint Drilling Calculator – Precision at Every Stage
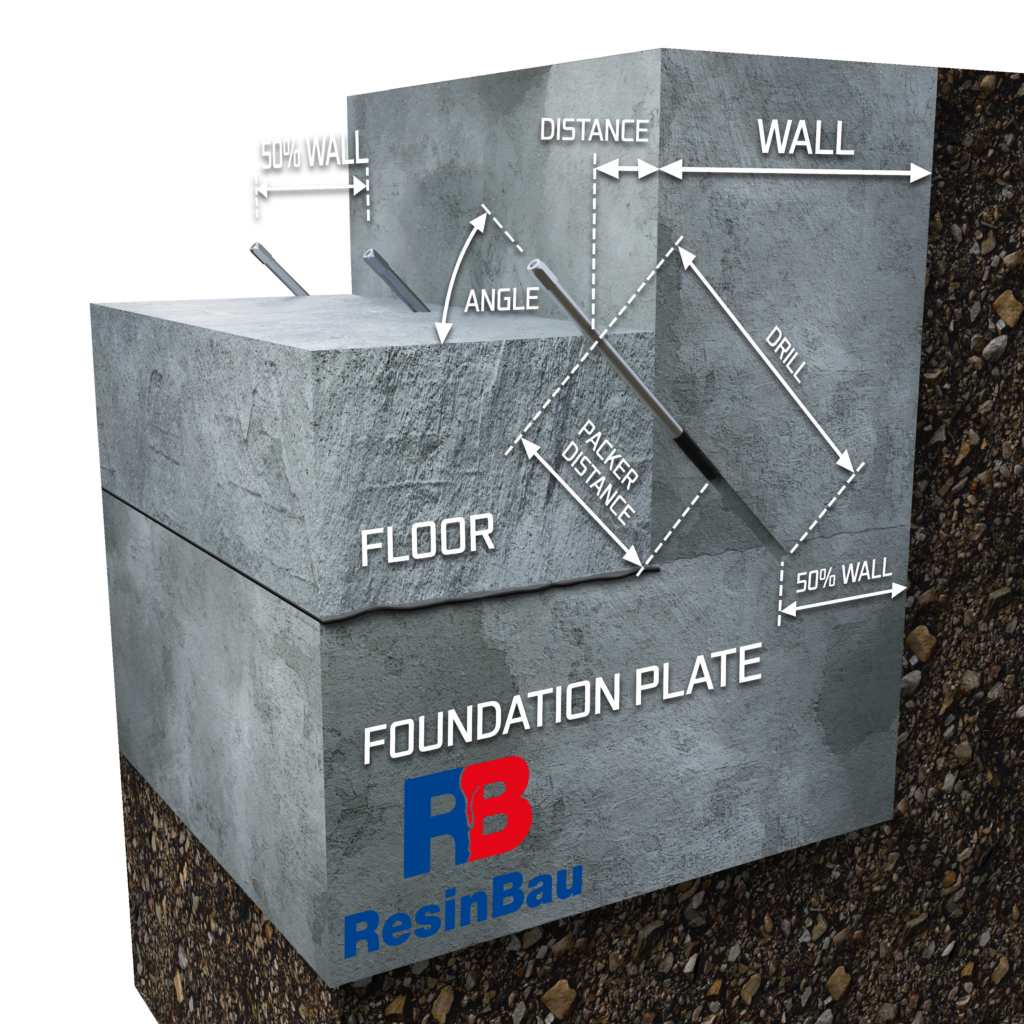
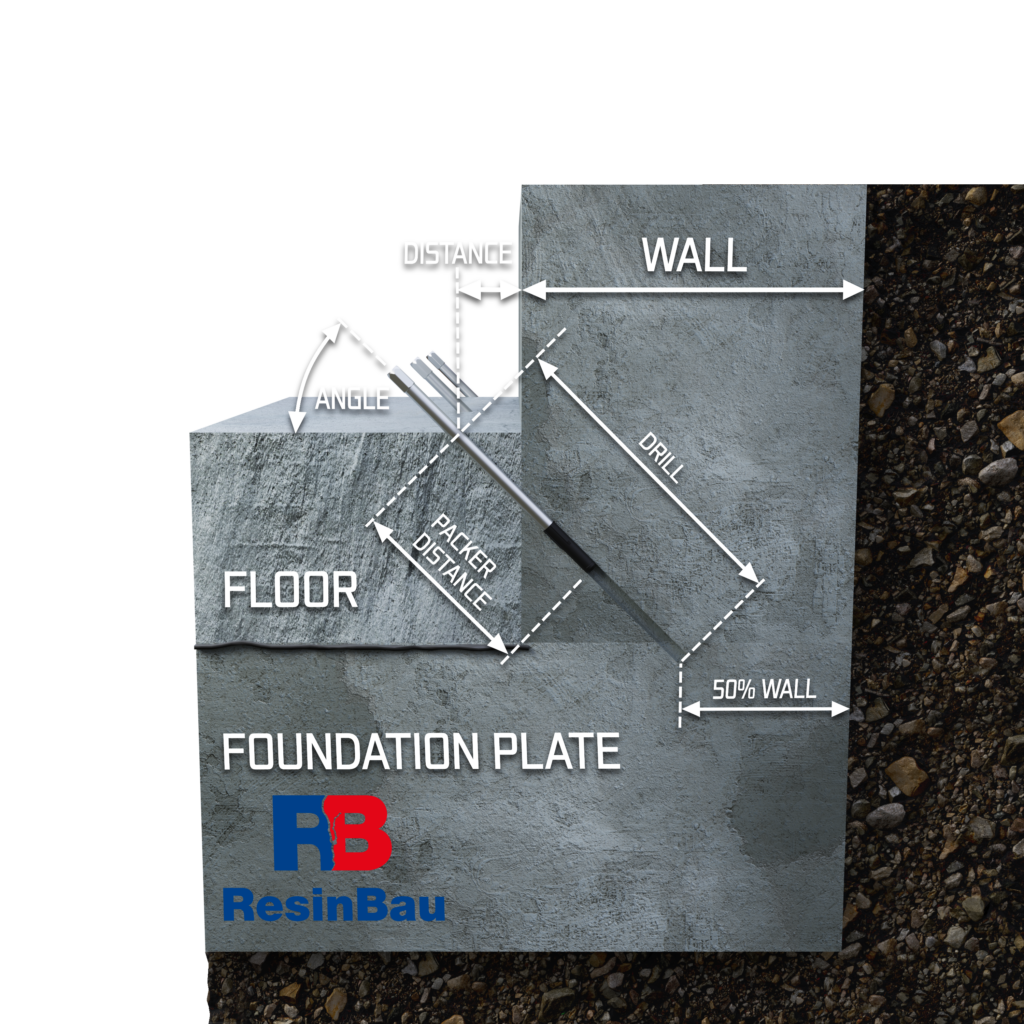
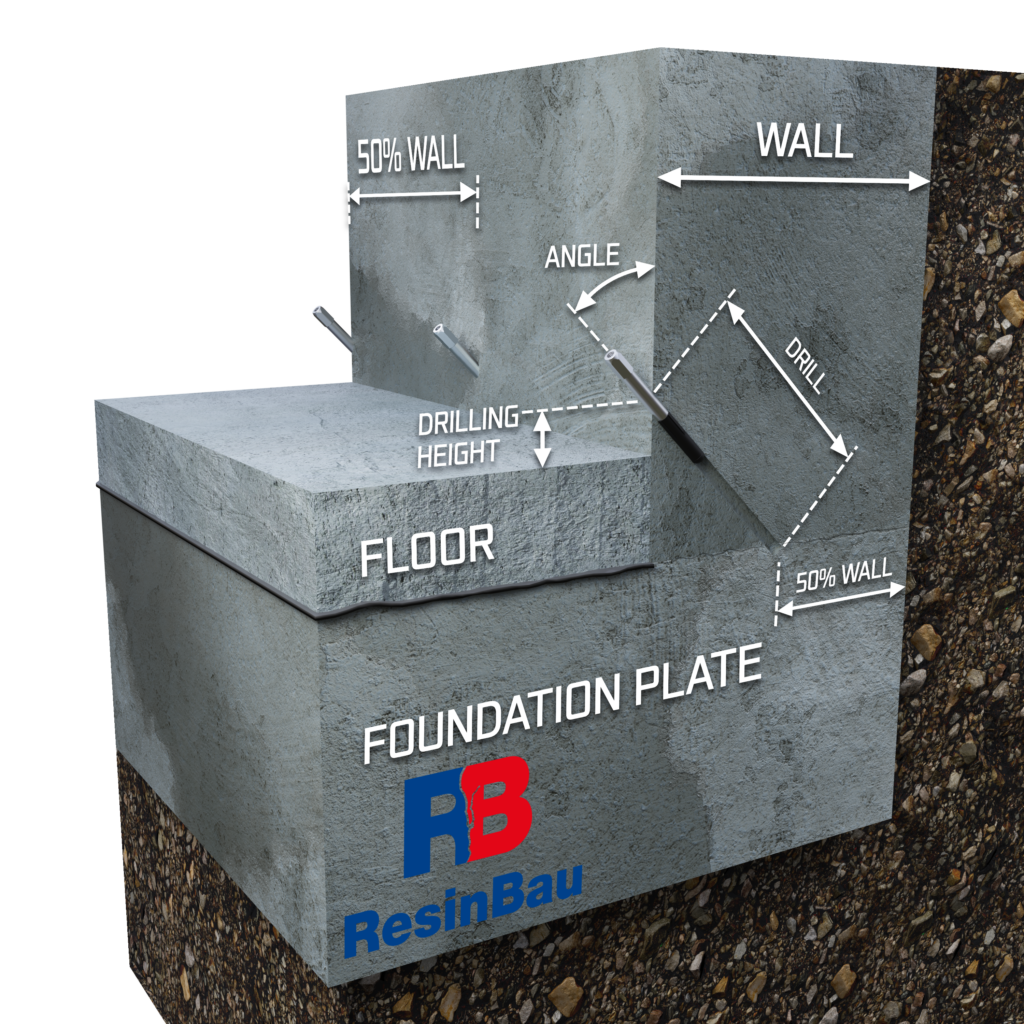
The joint drilling calculator is a tool that enables a precise determination of the angle, depth, and distance of drilling, ensuring repeatability and effectiveness of injection at the interface where walls meet foundation slabs. It is an essential resource for engineers and contractors looking to avoid errors that can lead to improper injection.
How does the calculator work?
The calculator needs the following data:
- Wall thickness [cm]
Provided as the basis for calculating the drilling depth and injection point. - Floor thickness [cm]
Enter in centimeters; type “0” if there is no floor. Including this parameter helps determine whether it is better to drill through the wall or through the floor. - Assumed point of drilling the joint – choose one of three options:
• 50% of the wall thickness – standard for most projects.
• 40% of the wall thickness – an intermediate option.
• 30% of the wall thickness – minimal, for limited conditions.
Key features of the calculator
🔧 Drilling angle and distance from the wall
- The calculator precisely indicates at what angle to drill in order to reach the specified part of the wall–foundation slab interface.
- It also shows at what height or how far from the wall to start drilling, helping avoid errors when attempting to reach the correct drilling point.
- It indicates how deep to drill to reach the interface (it is suggested to drill a bit deeper to ensure you penetrate the wall–slab interface).
🔧 Drilling through the floor
In cases where a floor is poured on top of the foundation slab, the tool shows:
- Whether it is possible to reach the joint through the wall.
- How many centimeters to move away from the wall and how deep to drill through the floor to reach the wall–foundation slab interface when the ratio of wall thickness to floor thickness is unusual.
🔧 Depth for setting the injection packer when drilling through the floor
The calculator also accounts for parameters related to setting the injection packer:
- The depth at which the packer should be seated so that the expanding rubber anchor is in the foundation wall rather than the floor.
This is crucial for effective injection—if the packer is anchored in the floor rather than in the wall, proper injection of the joint will not be achieved.
Practical tips
- Add a few centimeters to the drilling depth to ensure you fully penetrate the interface between the wall and the foundation slab.
- Always check the angle and height above the floor/distance from the wall – the calculator provides certainty that the drill holes will be repeatable and consistent with the project assumptions.
- Use a laser level and a built-in inclinometer on the drill for best results.
- Check calculations for different joint points – 50%, 40%, 30% – and choose the most effective solution by carrying out a test injection before starting the main injection work.
The joint drilling calculator is a tool that increases precision, shortens work time, and eliminates errors when injecting concrete structures.